Learn how to Enable Virtual Machine Platform in Windows 11 if will want to install WSA. This short tutorial explains how to Enable Virtual Machine Platform in Windows 11 the easy way.
Windows 11 is a major version of the Windows NT operating system developed by Microsoft that was announced on June 24, 2021, and is the successor to Windows 10, which was released in 2015.
As things stand, this Windows version is compatible only with a handful of devices. But you can overcome the limitation (Bypass TPM 2.0) and install Windows 11 even on unsupported devices.
Promoted contents:
- Who is the founder of BBC?
- Toshiba Corporation: Who is the founder of Toshiba?
- Google Releases Android 14 Beta 3, With Platform Stability and New Features
- Who founded Nokia? Here is all you need to know
- Who is the founder of HTC Corporation?
- Fast Charging and Multiple Variants: Samsung’s Galaxy Tab S9+ and Tab S9 Ultra Unveiled
- Who is the founder of Realme?
- The Mobvoi TicWatch 5 Pro has been launched
- Rumours of the Galaxy S23 FE: A budget-friendly variant of the Galaxy S23
- The upcoming iOS 17 will add the ability to use your locked iPhone as a smart display
Virtual Machine Platform
It is a copy of a computer system that is built virtually on a computer system. Virtual Machine Platform can be used to create MSIX Application packages for an App-V or MSI. Virtual Machine Platform can be used to create MSIX Application packages for an App-V or MSI.


How To Enable Virtual Machine Platform on Windows 11
To enable Virtual Machine Platform on your Windows 11, proceed thus;
- Click on the Start button and search for “Control Panel”
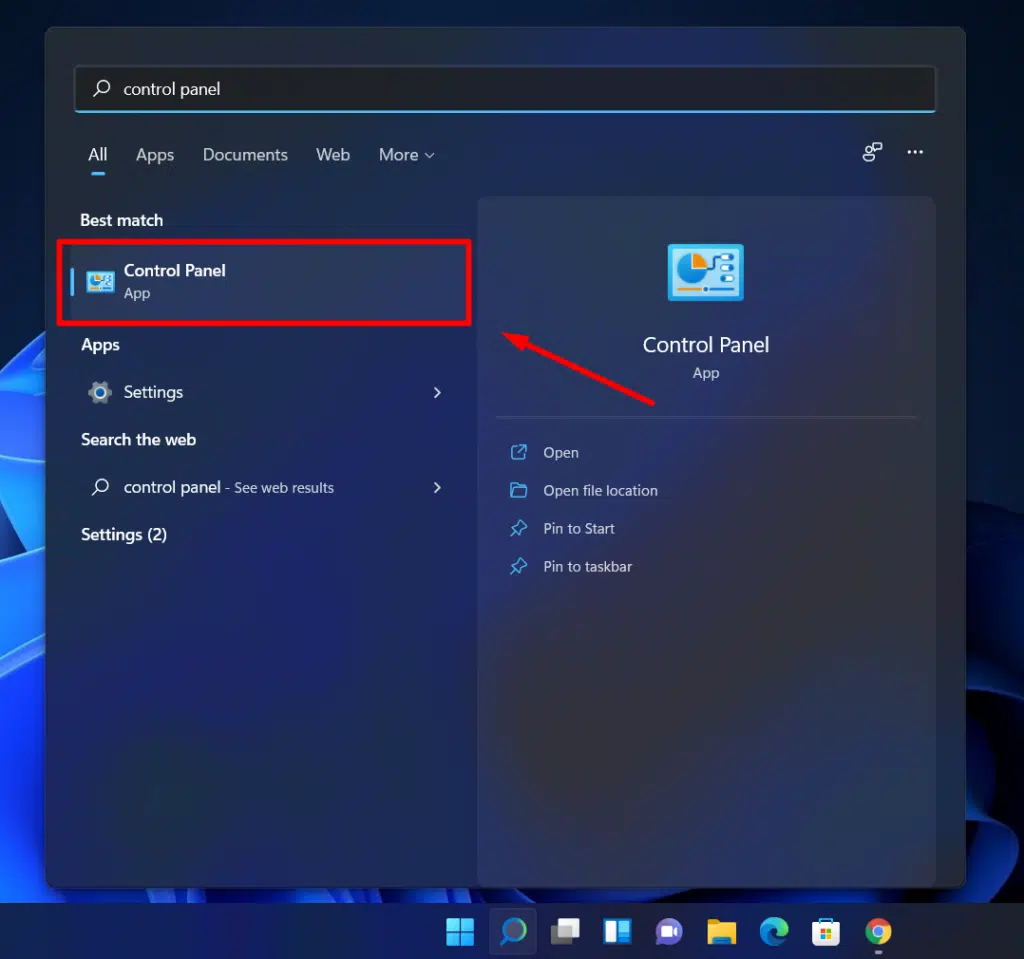
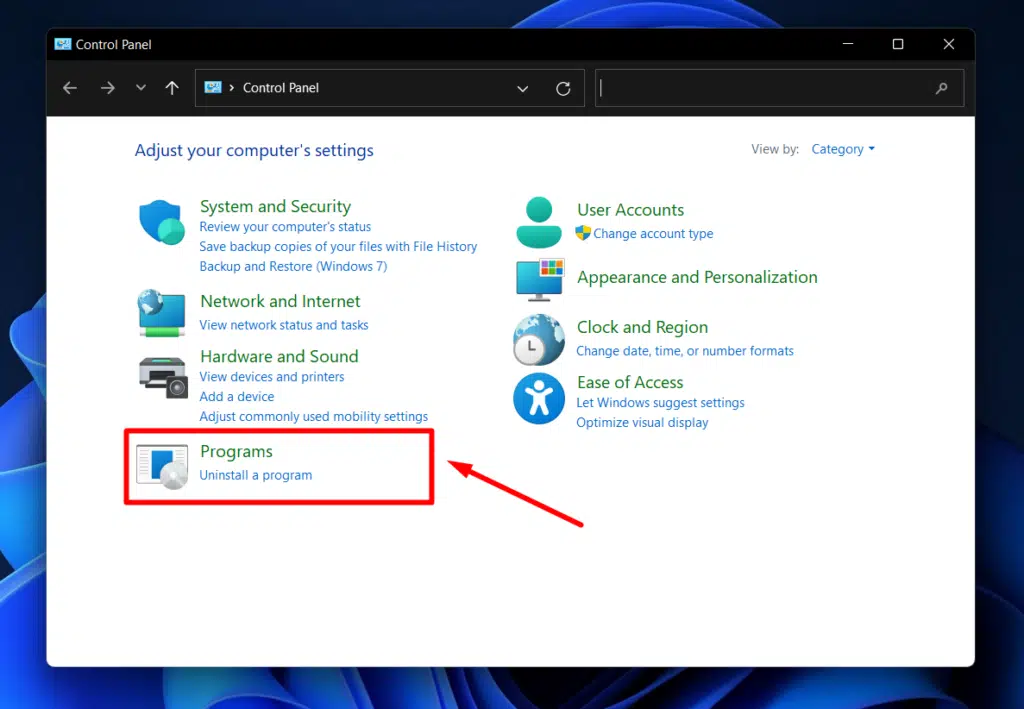
- Launch the Control Panel App and then click on “Programs”.
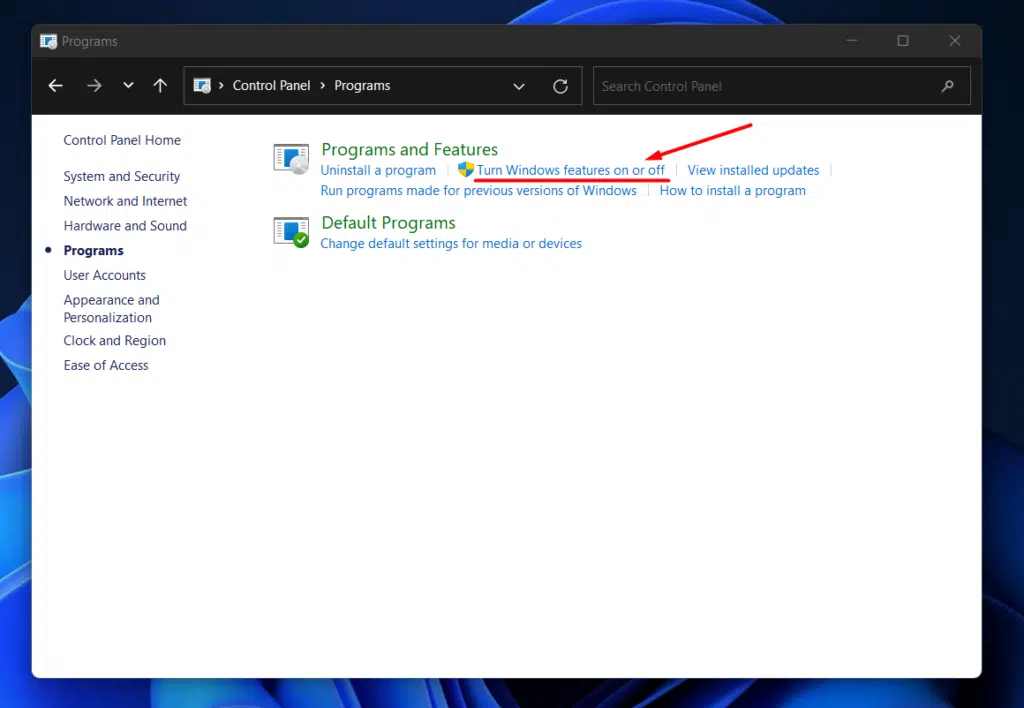
- Now, under Programs and Features, click on “Turn Windows Features on or off”
- Windows Features dialog box will open. Scroll down and check ” Virtual Machine Platform” then confirm by clicking “OK”.
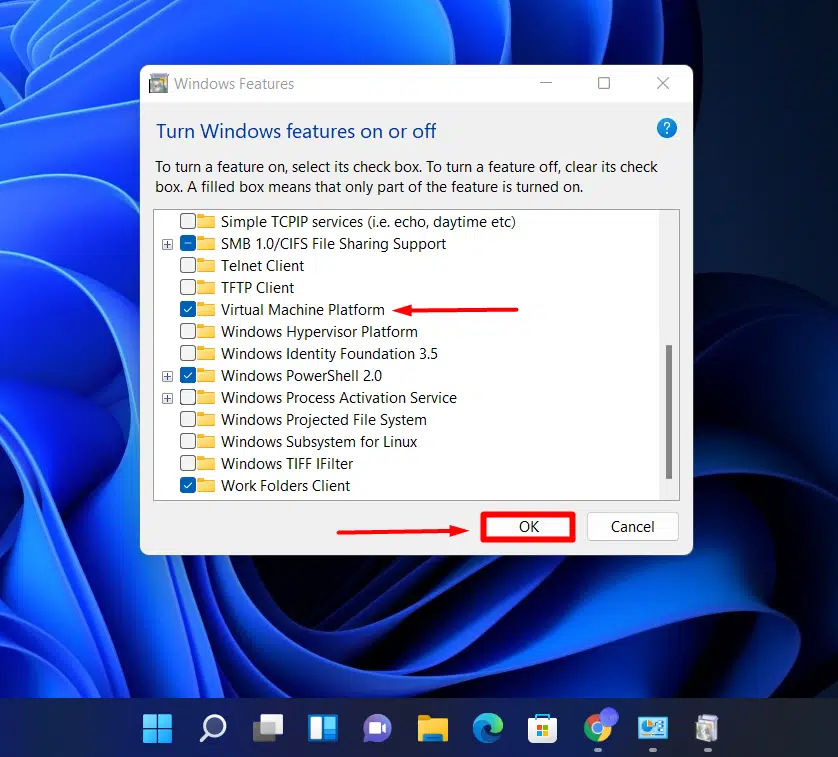
- Your system will now search for the required files and install. Once this is done, restart your computer.
Recommended for you: